"Bat Those Beautiful Lashes"
Ok ok, so I'm a little late on this one. My cousin has been graciously reminding me to get on the ball and post my promised lecture, so here I am.
Laaaaadies, how many of you have not yet tried the wonder that IS the fake eyelash? Its a little bit of a freaky endeavor, right? Let me just say - I used to be terrified and mystified by the whole idea, until one fine day when I wandered into a MAC store and the nice lady there spent her valuable time instructing me in the fine art of eyelash application. I have decided that its about time to share what I have learned and invite the next generation of eyelash users to join me in this crazy flirtatious fiesta. Here we go...
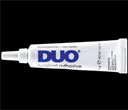
THESE are the products you will need to buy:


The lashes I am showing you above are my personal favorites - the MAC #7. Both MAC and Shu Uemura have great selections of sexy lashes for any occasion. The lash glue you should be able to get anywhere that you can buy lashes. So here's what it looks like when you get home and get yourself set up:

Yes yes, my photography is NOT professional. But I digress. Let me enumerate the steps for application to make this as simple as possible:
BEFORE STARTING:
* Most fake lashes will be a little too long for your natural lashline. You may trim them to fit the entire length, or you might want to trim them to use just on the outer portion of your lashes, which a fair number of people do.
* Don't leave your first application attempt until right before you want to go out. Give yourself a test run or two so you can get comfortable with the process and with the look you want to achieve.
* You will get glue in your eye at some point. Don't worry, it won't kill you, but it IS a giant P.I.T.A.. Just blink it out, or use a cotton swab to try to get it cleared out.
* Fake eyelashes are reusable! You can peel the dried glue off (sounds gross) and keep them in the case for a good 5-10 uses.
THE APPLICATION PROCESS:
1. Break cotton swab in half - you will be using the stick ends to help position the lashes.
2. Some people curl their natural lashes before applying the falsies - that is up to you and your natural lashes. You may need it, may not.
3. Apply a medium quantity of lash glue along the base of the fake lashes - not too little, not too much. Allow to dry for approx. 1 minute. This allows the glue to get a little tacky before you attempt to smoosh it around your eyelid.
4. Starting at either end of the lash, gently align the falsie to your natural lash line as best you can.
5. Take one of your cotton swab sticks and use the stick end to now help push the falsie into your natural lash base. This fits the false lash snugly alongside your natural lash so its not sticking out from your eyelid. Don't poke yourself in the eye, but you want to get the base of the false lash in as close as possible.
6. Now you may apply mascara, after allowing the fake lash to dry in place for a minute or two. This helps match up the individual lash hairs. Some people choose to re-curl the ends of the paired real and fake lashes together gently, also. Up to you.
7. You may now want to/need to touch up your other eye makeup. Go for it.
TAKING OFF THE BEASTS:
Taking off the falsies is pretty easy - just gently tug. Use a good eye makeup remover to get all the gunk off. I like using the MAC or Sephora liquid removers that you can swipe over your lid with a cotton ball.
Now, go into the cosmetic world in peace and give some fake lashes a try some time. They're great for a night out when you want a little extra sexy kick. You'll be winking at the bartender all night long.


0 Comments:
Post a Comment
<< Home